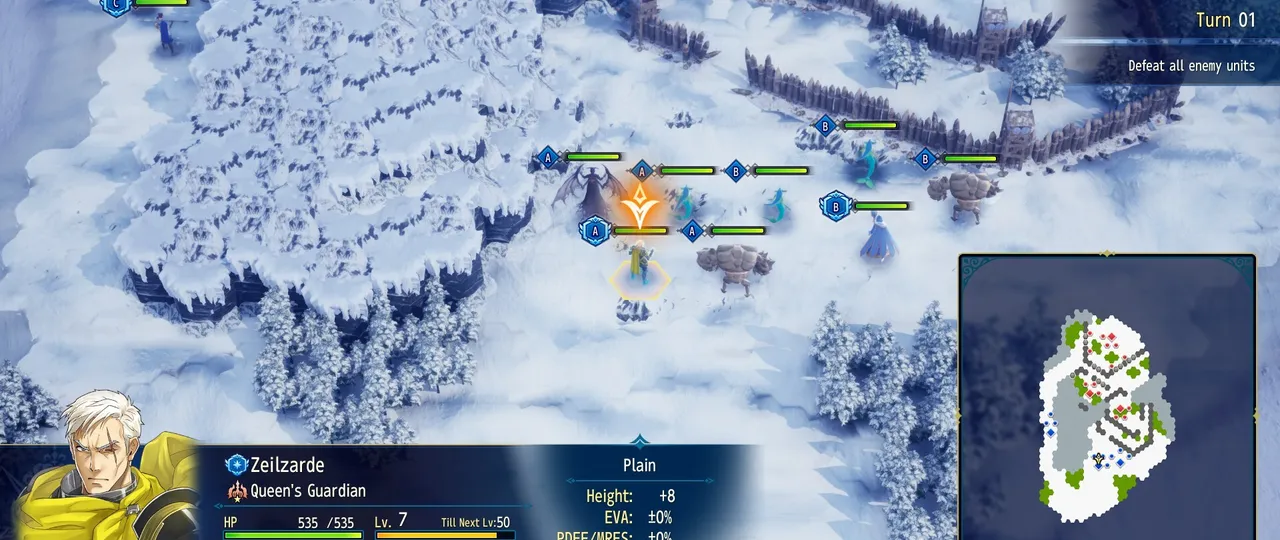
Combat Quick Answer
Section titled “Combat Quick Answer”Before you move or commit to a charge, check in this order:
Position → Elevation → Terrain → Element → ZOC → Counter risk
This order emphasizes placing your unit where it can act, checking height differences and movement options, choosing terrain that helps you, using element/affinity as a secondary advantage, then confirming which enemy threatened spaces (ZOC) affect the route and whether the target can punish you.
[IMAGE: hex grid example showing ZOC, elevation layers, and terrain chokepoints]
ZOC — Zone of Control
Section titled “ZOC — Zone of Control”- What ZOC is: think of ZOC as the set of threatened spaces or enemy control area on the hex grid. Any hex influenced by enemy adjacency or positioning can be risky to enter.
- Why a route that looks open may be dangerous: a seemingly clear path can cross multiple enemy-influenced hexes. Entering those threatened spaces can expose you to flank attacks, block retreats, or allow enemy support to trigger.
- How to identify enemy control area: look for enemy-adjacent hexes, overlapping threat cones from multiple squads, and positions where retreat routes would be cut off. The official System page confirms threatened spaces matter but does not publish numeric ZOC penalties.
- How ZOC affects play: it changes whether you can safely flank, retreat, or stay in a position. Leaders should not charge alone into threatened ZOC — a leader defeat forces the entire squad to retreat (official System page).
- Note: do not expect exact movement-penalty numbers or formulas from public sources; use ZOC conceptually to judge danger rather than relying on hidden numeric thresholds.
Elevation
Section titled “Elevation”- Why elevation matters: height differences affect approach, escape options, and whether ranged or support Monsters can safely contribute. High ground can force attackers through predictable channels and create chokepoints.
- Ground vs flying: flying or high-mobility families have distinct movement traits. Producer Letters confirm a Dragon Rally trait that grants +1 movement; however, public documentation does not fully verify that all flying units ignore elevation in every case.
- Chokepoints and inaccessible positions: elevated terrain often limits paths of approach. Use elevation to funnel enemies or to keep vulnerable leaders out of immediate reach.
- Ranged/support use: place support or ranged Monsters where elevation lets them contribute safely without being pulled into enemy ZOC. See Rally & Support.
Terrain
Section titled “Terrain”- Movement and positioning: terrain alters routes and creates choke points. Plan paths that minimize exposure to multiple enemy threats while still allowing access to objectives.
- Terrain effects: the System page confirms terrain has effects and some obstacles have special rules; it does not publish precise numeric modifiers. Rely on qualitative effects (slower, blocked, or special interaction) reported by the System documentation rather than invented numbers.
- Chokepoints and route selection: identify narrow passes or obstructed sectors where fewer enemy units can react. Use those to force favorable engagements or to protect a withdrawal route.
Elements (Affinity)
Section titled “Elements (Affinity)”- Affinity is a documented advantage and should be part of your unit composition and targeting choices. The System page advises assessing attributes, characteristics, skills, and equipment along with element when combining units.
- Producer Letters give specific Rally/element examples: Dragon movement bonuses via Rally, a Demon dark-element tradeoff mentioned, and Pixie MP recovery as an elemental Rally example. These confirm Rally traits can include elemental effects.
- Treat elements as subordinate to core positioning decisions: an affinity advantage is useful, but it won’t save a leader who walks into multiple threatened spaces without support.
Formations, Leaders, and Support
Section titled “Formations, Leaders, and Support”- Formations: a squad is led by a leader and can include up to five Monsters; formation is determined by the leader (official System page).
- Leader risk: leader defeat forces the entire squad to retreat. Leaders often determine formation and support options, so protecting leaders from lone charges into ZOC is critical.
- Support (Rally): the Support command allows one Monster to join the leader and provide a support ability. For more on support effects and Rally traits, see Rally & Support.
Leader-sniping and trade-offs
Section titled “Leader-sniping and trade-offs”- Player reports from launch discussion note leader-sniping as a possible tactic but also a trade-off. Defeating the leader is a fast way to force the squad to retreat and end a dangerous fight quickly, but doing so too early can sacrifice monster XP when you are behind.
- Practical decision rule: if the battlefield is under your control and you have the resources (healing, gear, a safe position), clear remaining monsters to maximize gains. If a unit is near death, you lack healing, or terrain leaves you exposed, finishing the leader to end the fight is often the practical choice.
- Because leader defeat forces squad retreat, sniping can swing a battle but is high-risk for the attacker if it exposes your own leader or leaves you open to ZOC reactions.
Before You Move
Section titled “Before You Move”- Can this unit reach the destination?
- What elevation separates the units?
- Which enemy ZOC affects the route?
- What terrain will the unit end on?
- Can the target counter or punish the move?
Use this checklist every time you commit a leader or valuable Monster to a forward position.
Where to read more
Section titled “Where to read more”- Rally & Support — Rally Traits and squad composition impact
- Best Monsters — role-based picks for your army
- Equipment — gear that affects survivability and positioning
- Classes — skill and movement considerations by class
- Organization Phase — prepare squads before the next battle
Sources and scope notes
Section titled “Sources and scope notes”This page follows the System documentation and Producer Letters published by NIS America. Confirmed facts used here: hex-grid battles and threatened spaces, affinity as a documented advantage, height differences and terrain effects, leader and squad rules (leader defeat forces squad retreat), squad size limits and formation basics, and Rally-support examples from Producer Letters.
Some practical interpretations are drawn from player reports and the Producer Letters (e.g., Dragon Rally +1 movement). Exact numeric ZOC penalties, terrain numeric modifiers, damage formulas, or full movement rules have not been published; where such details are required for precise planning, treat them as unknown and use qualitative judgment instead.